Showing posts with label harness. Show all posts

Tuesday, August 23, 2016

Pro Car Innovations - Sparco Sprint V Seat Bracket

I somewhat recently purchased the passenger and driver side Sparco seat brackets from FRSport for the miata. I never felt like the bracket that I made was good enough to pass a real safety inspection as the seat could rotate just a little before the rear 'latch' hit the cross piece. So rather than design and make a new one, I went the lazy route on this. The PCI brackets looked well made and most importantly looked like it would get my seat low while still using the factory mounting locations. The only thing that you have to do for these brackets is, on the driver side only, hammer the trans tunnel in to make clearance. If you look at my post about the bracket I made, I had to do this also. This bracket requires more 'messaging' of the tunnel than what I originally did. But it was easy and I had no problems with a big hammer and a little patience.

I am happy to report that the bracket does keep me really low. I really don't think I can get my seat any lower without having to cut out the factory mounts and make my own. At which point I would still need space for the submarine belt mounts, so I could maybe get another 0.5". The adjustments on the side are also enough that I can get the bracket to work both for me and the lady friend (well close enough for her, we have to bolster her forward just a little extra so she can push the clutch in all the way). But considering I am 6'0" and she is 5'5" (This is a guess), the bracket offers a lot of adjustment.

I am writing this blog entry to show some tricks I have found on getting the seat in and out of the car. If you are short and have the seat mounted forward on the bracket, then it is very easy to bolt the seat to the bracket. Then put the whole assembly in the car and bolt the bracket to the car. But if you run the seat far enough back, like I do, you run into the problem of getting the rear bolts for the bracket in. Well then you have the option of bolting the bracket to the car then dropping the seat in and putting the side bolts in. This would be fine if there was some GOD DAMN clearance between things! You can make it happen but it is slow and frustrating. So below is what what I have found to work the best for getting the seat in and out. I can take the seat out and have it put back in under 5 minutes this way.
Step 1: Start with putting the two front side bolts in. Keep them loose enough that you can rotate the seat around them.

You need to be able to rotate the seat like this.
Step 2: If you have one, get the harness pieces out of the way.

Step 3: Bolt down the front of the bracket. You can make these tight.
Step 4: Rotate the seat up as far as you can.
Step 5: With the seat rotated up, you should be able to reach back in there and get the two rear bolts in and tight.
Step 6: It is still a little frustrating, but now put the two rear side bolts in. I find it easiest to use a ratcheting wrench to help make things go quickly. Tighten down all of the side bolts and you are good to go!
Easy as that everyone. Once you do this a couple of times, you will be able to get the thing in and out if needed in no time at all. Now time for TRACK DAY BRO!

Nothing like a track day with your bro's, even if your car is the slowest one down the straight


Monday, March 28, 2016

Adding the 6 point harness

If you are going to take the time to put in a racing seat and a roll bar, you gotta have the harness. It adds the extra level on inconvenience for getting in and out of the car to give it that real race car authenticity. If you are scared of drilling holes in the car, this is not for you. How I did it, it only required three new holes and it was super easy to do. In all I got the harness in the car in a little over an hour.

A lot of people with NA Miata's reuse the factor seat belt mounting locations. I did this too, but with my NB the seat belt clip is on the OE seat itself. So that just means we need to drill 3 holes instead of 2. For my harness I got a G-force 6 point, pull down harness. The shoulder straps are wrapped to the hard dog harness bar that I have installed.


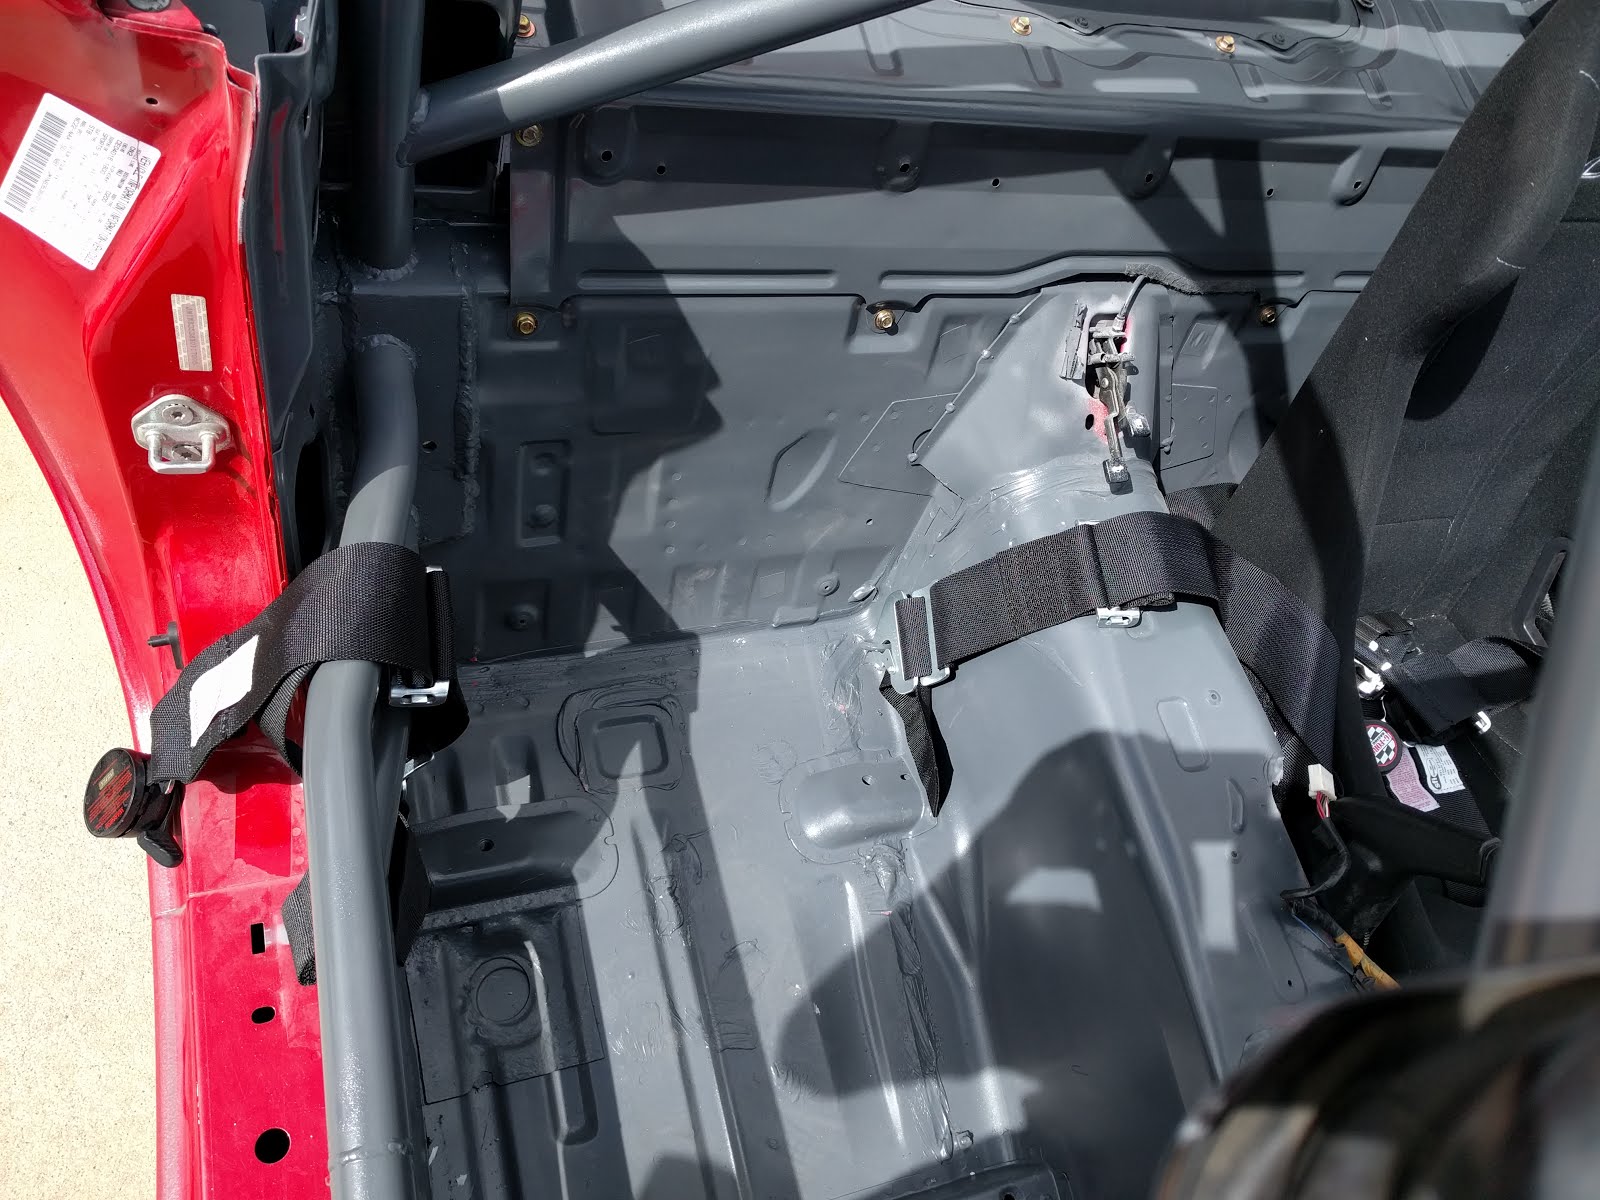
You have to drill two holes on the floor for the anti-submarine belt and one on the trans tunnel for the right side lap strap. hehe, lap strap.


For my harness i got a set of the quick release tabs that replace the standard bolt on pieces. This allowed me to just put in eye bolts to clip the harness too. This makes it easy to put in and out. For the factory seat belt hole I got an eye bolt with a 7/16-20 thread on it. This would work but it ended up colliding with my seat, which was a bummer. I have ended up just bolting the left lap strap in and not using the eye bolt. The other three are 5/16 threading. If I got any larger, then the eye portion runs into the bottom of my seat. 

Now for the most important part of putting in a harness. THE BACKING PLATES! Some people on the forums say just use large washers to distribute the load. Well I am trusting my life to this thing and I definitely don't want a mount tearing through the sheet metal. So each of the three smaller eye's has a backing plate from 1/4" steel. I made them as large as the space would allow for a decent amount of load distribution. 


I used Nylock nuts to hold them all in place. Tighten them all down and you are ready to go!