This post is the second half to the brake changing post. I thought I would separate the front and rear of the car so the posts would be a little shorter. The steps are very similar and if you can do one, you are probably capable of doing the other, but I figured I would capture both since there are a couple differences.
If you are looking for how to do the rear brakes, follow this link to my other post
Doing the pads and rotor vs. just pads on the front end up being even more similar than the rear. For the sake of my laziness,
IF YOU ARE DOING PADS ONLY, START ON STEP 7.
Replacing Pads and Rotor
1 .Jack up the front end of the car and support it properly. Then remove the front wheels.
2. Remove the two 14mm bolts holding the caliper on. Once those are out, pull the caliper and old rotor off. Right now is a great time to get a brush and clean off the face of the hub to remove any rust/deformities as you want this surface to be as flat as possible.
 |
| Once the old rotor is off, clean off the hub face to make sure it is flat. |
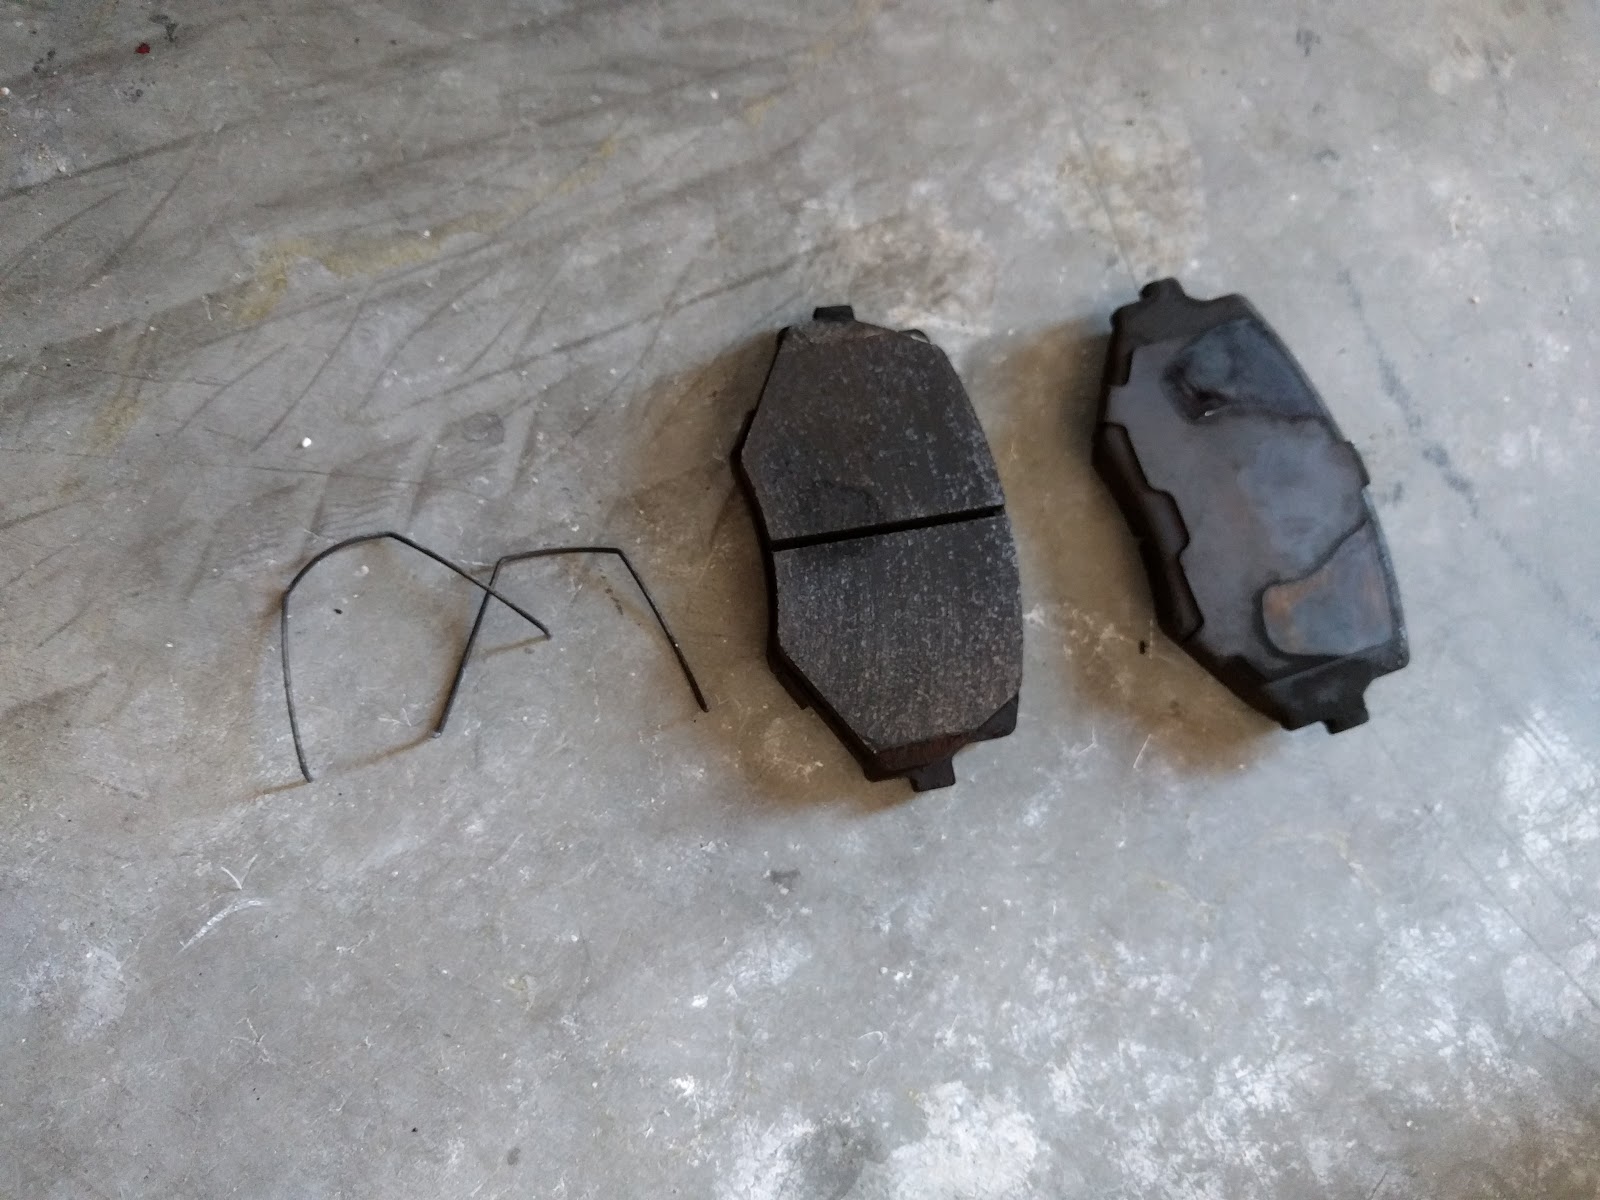
3. Remove the old pads from the caliper. Make sure not to damage the two spring clips that are on the backside of the pads.
4. Take some brakleen (or similar) and clean any oil off of the new rotor. It is important that no oil or grease be on the new rotor or pads. At the very least clean the crap out of the face of the rotor that is going towards the inside of the car as it is really hard to clean once installed if you have the OEM brake shield still on.
 |
| Clean any oil off of your shiny new rotor |
5. Install the new rotor making sure not to touch the braking area with your hands as this can put oil back on the rotor.
6. Now reattach the caliper to the knuckle without any brake pads in the caliper. Tighten the 14mm bolts to their proper torque (
36-51 lbf-ft) and add some loctite at this time.
 |
| I find it easiest to take the old pads out, put the new rotor on, the re-torque the caliper mounting bracket before continuing on |
7. Loosen and remove the two sliding pin bolts. Once removed, the caliper body should easily come away from the caliper bracket.
8. Now with the caliper body free and easy to work on, you will need to retract the piston back into the caliper body. If you don't have a dedicated tool for this, it can be done using the old pad and a C-clamp as shown below.
 |
| Caliper with piston still out some |
 |
| caliper with the piston fully retracted |
9. Now put on the new brake pads onto the caliper bracket. Make sure all of the little metal retainers are in there and are undamaged.
 |
| Caliper with body removed and new pads inserted onto caliper bracket |
10. Now add the brake grease to the outside of the pads (They should have their backing plates on). This is also a great time to clean off and grease the slide pins.
 |
| Brake pad with grease on it. Make sure to do both sides |
11. With everything greased up, slide the caliper body back on over the brake pads and insert the top pin and tighten a little bit. This should keep the body attached but let you rotate it up.
 |
| Caliper body re-attached with just the top pin |
12. With a little finesse, rotate the caliper body up so you have access to the back of the pads. There are two sets of holes on each pad, one on the top and one on the bottom. Reattach the spring clips by inserting the little ends into these holes. Do this for both the top and bottom. They are oriented as shown below.
 |
| The spring clips that attach to the brake pads. It is easiest to do this with the caliper body still over the pads some so the spring clips can't push the pads out of their place on the caliper bracket |
13. Now insert the lower slide pin and tighten both pins to
58-65 lbf-ft. Make sure not to damage the rubber boots that sit between the caliper body and bracket that keep water and such out of the pins.
14. Get in the cabin of the car and pump the brake pedal a couple of times to make sure that everything is working and feels like it should.
DON'T HIT THE BRAKE PEDAL IF YOU HAVE ANY CALIPERS NOT FULLY ASSEMBLED. THIS ISN'T THE END OF THE WORLD BUT WILL JUST MAKE YOUR LIFE HARDER BY EXTENDING THE PISTON AND YOU WILL HAVE TO RETRACT IT BACK INTO THE CALIPER BODY
15. With all this done, you can be on your merry way! Always test the brakes themselves before heading out. Brake pads also have a recommended bedding procedure by the manufacturer. I highly recommend you do that so you get the most out of your new pads.